Latest Posts

Homemade Oreo Icecream


Weather it's McFlurry or cookies and cream ice cream, Oreo is the star of all my favorite treats. Homemade ice cream can become a pain to make when you are using an ice cream maker. So this is now my all-time favorite recipe, because you only need 5 ingredients and no ice cream machine!

All you need is heavy whipping cream, sweetened condensed milk, powdered sugar, vanilla, and of course, Oreo Cookies.

For the tools, you will need a large bowl chilled in the freezer for about 20 minutes, an electric mixer, and a container to store your ice cream in.

Start off by whipping the cream until you have formed stiff peaks, around 6-7 minutes. I have illustrated the difference between soft and stiff peaks below. Basically, when you lift up the whisk, and the cream stands up straight without curling, you have reached the stiff peaks stage.

Soft peaks curl up at the top (left) while stiff peaks stand straight up (right)

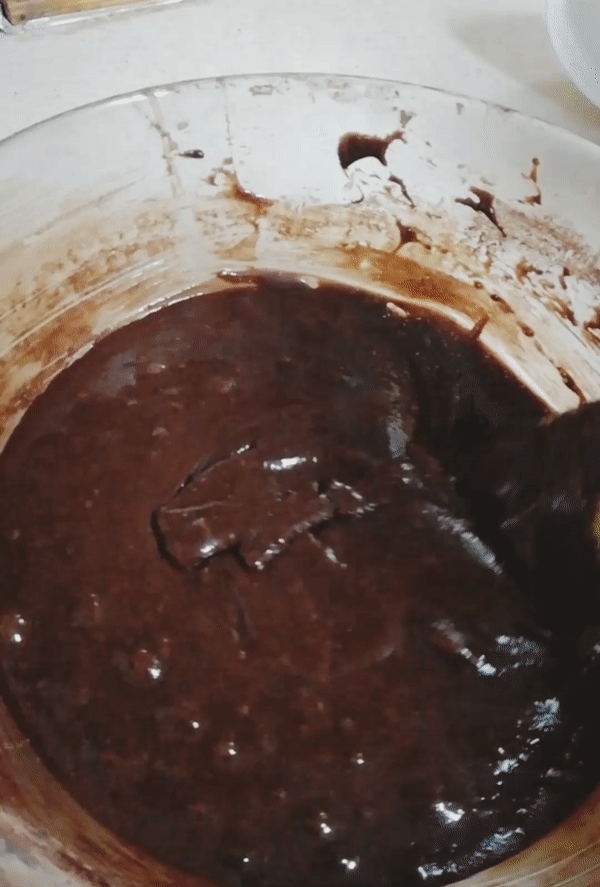
Next, slowly pour in the condensed milk and whip until just combined. Then add the powdered sugar and vanilla and whip. Finally, add the crushed oreos and mix with a spatula. For me, 4 packets of oreos are enough (16 cookies total), but feel free to add more if you like. To crush the oreos, I just smash the packet with my fists (it's actually really fun) until they are crushed, and then pour the contents out into the bowl.


Cover the bowl with a lid and freeze for at least 6 hours, preferably overnight. I use a store-bought ice cream tub to store my ice cream.

Enjoy!

Homemade Oreo Ice cream 

Prep time: 10-15 minutes                    Serves: 5-6

Print this Recipe


Ingredients: 
  • 2 cups (500 ml) heavy whipping cream 
  • 7 oz (195 gm) sweetened condensed milk 
  • 2 tablespoons powdered sugar 
  • 1 teaspoon vanilla essence 
  • 16 Oreo cookies (4 packets), chopped

Instructions: 

1. Chill the mixing bowl in the freezer for 20-25 minutes. If you are using an electric hand mixer, then chill the whisks of that too. 
2. Pour whipping cream into the bowl and beat on high speed for 7-8 minutes, or until stiff peaks form. 
3. Slowly stir in condensed milk, powdered sugar, and vanilla while continuing to beat and mix until combined. 
4. Break the oreos into small pieces and mix them in with a spatula.
5. Freeze for 6 hours, preferably overnight. 
6. Scoop out and serve!


Did you try it? Let me know in the comments below!


Fudge Brownies


The best part about this brownie recipe is that you only need one bowl to make it! I hate when recipes require you to measure out and mix ingredients in different bowls. It takes so much time (plus more dishes that need to be washed. ugh.). Add chopped chocolate or chocolate chips to this recipe for an ultra-rich flavor.

First, you are going to combine your melted butter, oil, and sugar in a medium bowl and beat for about a minute. You can use an electric hand mixer or a whisk, whichever you find more convenient.  Here, I used 1 cup of sugar because I like to taste a slight bitterness of the cocoa, but you may add an additional 1/4 cup if you are into a sweeter brownie.
Now you will add your eggs and vanilla and continue to beat until the color of the mixture turns a light yellow.


Now sift in the flour, cocoa powder, and salt and gently fold it into the mixture. The batter will be fairly thick. Pour it into a greased pan lined with baking paper and bake. That is all!


Note: Be careful not to over-bake to get the fudgy texture, but even if you do you will just end up with a cakey brownie, so it's basically a win-win situation.

Important: Cool the brownies completely before cutting them into squares. This recipe will yield about 12-16 squares, depending on how large you want to cut them. I cut mine quite small because I lack self control and will eat five at a time.

Fudgy Brownies 

Prep time: 15-20 minutes                    Cook time: 20-25 minutes                    Serves: 6

Print this Recipe

Ingredients: 
  • 1/2 cup unsalted butter, melted
  • 1 tablespoon oil
  • 1 cup granulated sugar 
  • 2 large eggs 
  • 2 teaspoons vanilla extract 
  • 1/2 cup all purpose flour 
  • 1/2 cup unsweetened cocoa powder 
  • 1/4 teaspoon salt
  • Chopped chocolate or chocolate chips (optional)

Instructions: 


1. Preheat oven to 350 F. Lightly grease an 8 inch square pan and line with baking paper.
2. Combine melted butter, oil, and sugar in a medium sized bowl. Mix for a minute. Add eggs and vanilla. Beat for about another minute (until color changes).
3. Sift in flour, cocoa, and salt and gently fold into the mixture.
4. Pour batter into pan and spread it evenly with a spatula.
5. Bake for 20-25 minutes, or until the center no longer jiggles and is just set to the touch. Do not over-bake.
6. Wait till brownies are completely cool before cutting into squares.


What type of brownie do you like? Let me know in the comments below!

Mom's Garlic Bread Recipe


Buttery, garlicky, irresistible goodness! This is a recipe that my mom once whipped up on a Saturday morning, and you could say I was obsessed. Ever since, I have asked her every weekend to buy this bread and make it for us. Yes, we eat it for breakfast, although typically it is an appetizer or side course. Today, I used her recipe and made it myself because of how easy it is. This recipe has tons of garlic in it, allowing you to taste it in every bite.

Which bread is best for garlic bread? 

Make sure whichever type of bread you are using is fresh. I have made the mistake of buying old bread and that made the garlic bread too crispy and hard to chew. French bread, or baguette, works best for this recipe.  

You can cut this in half length-wise and spread the garlic butter on both pieces or, as I prefer it, cut into approximately 1/2 inch thick slices. I find that the round slices are easier to just grab off the counter and eat rather than having to cut it up after baking.

Garlic butter 

I melt unsalted butter in the microwave instead of softened butter, because it absorbs into the bread better. Into the melted butter, I add minced garlic, garlic powder, and some salt. I slather all my bread slices with this mixture. You want to make sure that each slice is fully covered in the butter mixture. 
Next, we pile on the cheese. I grated a block of mozzarella and sprinkled that all over, but for a richer flavor, feel free to mix in some cheddar as well. 

Toppings 

Coming from a South Asian family, I want everything to be spicy. Thus, I top my garlic bread with crushed red chili. I also sprinkle some thyme or oregano. Chopped parsley is what most restaurants and chefs typically use, but it is not my favorite. 

Finally, we bake our bread for about 10 minutes, or until our cheese is nice and melted. Garlic bread is best eaten straight out of the oven because the longer it sits out, the bread and cheese will harden slightly.

Now BRB while I devour 7 of these before my siblings wake up. 

Mom's Garlic Bread Recipe 

Serves: 5                    Prep time: 10 minutes                    Cook time: 10 minutes 

Print this Recipe


 Ingredients: 

  • 1 baguette 
  • 1/2 cup melted unsalted butter 
  • 1 teaspoon garlic powder 
  • 3 cloves fresh garlic, minced
  • 1/2 teaspoon salt 
  • 1 cup grated mozzarella cheese
  • crushed red chili pepper, thyme, parsley (optional for toppings)

Instructions: 

1. Preheat oven to 350 F. Slice the baguette into 1/2 inch thick slices and place on a baking tray. Set aside.
2. In the melted butter, mix fresh garlic, garlic powder, and salt. Coat the bread slices with this mixture evenly.
3. Next, sprinkle the cheese on top, generously covering each slice.
4. Sprinkle the desired toppings.
5. Place the tray in the oven and bake for 10 minutes, or as soon as the cheese is fully melted. Be careful not to bake too long as it could harden the bread and be difficult to eat.
6. Serve while it's still warm.

Did you try this recipe? Let me know in the comments below!

Best Brownies


Brownies were the first thing I ever made when I got into baking back in middle school. I was randomly flipping through a children's magazine and came across the recipe and thought: YES. 

Since then I made little tweaks and adaptations to the recipe to save myself more time while still making a delicious brownie, and now, they are my ultimate comfort food when I'm having a bad day or a really good day. So here I present to you my easiest homemade brownie recipe for when you need a sweet fix. It has a beautiful crackle on top and the most chewy edges (who else loves the corner pieces more than the center ones?) 

This recipe makes a slightly cakey brownie, but if you are a fudgy brownie person, then you can click here for the recipe. 

Note: Please do use unsweetened cocoa powder. If that seems too obvious, you'll be surprised to hear about how many people have asked me if they can use Nesquik chocolate powder (that you put in milk) as a substitute for regular unsweetened cocoa. Don't do that. I do recommend Hershey's Unsweetened Cocoa, but you can use whatever you have available.

Tip: If a recipe calls for softened or melted butter, it is recommended that you use room temperature eggs. They are less viscous than cold eggs, thus they mix well with the batter and also rise better.

Best Brownies 

Serves: 9                    Cook time: 30-35 minutes

Print this Recipe

Ingredients:
  • 1 cup melted unsalted butter
  • 2 cups granulated sugar
  • 2 teaspoons vanilla extract 
  • 4 eggs, preferably at room temperature
  • 3/4 cup cocoa powder
  • 1 cup all purpose flour 
  • 1/2 teaspoon baking powder 
  • 1/4 teaspoon salt
  • 1 cup chopped nuts or chocolate chips (optional) 


Instructions: 
1. Preheat oven to 177 C or 350 F. Lightly grease a 13" x 9" rectangular pan and line with baking sheet. 
2. Stir butter, sugar, and vanilla together with a wooden spoon.
3. Add eggs one at a time, incorporating each one well before adding the next. Add cocoa powder and mix.
4. Add flour, baking powder, and salt. Stir in nuts, if desired. Stir the mixture well. 
5. Pour the batter into the pan and bake with for 30-35 minutes, or until the sides begin to easily pull away from the pan. 


What type of brownie do you like? Let me know in the comments below!